SVG
Introduction
In order to display an SVG image on an HTML page SVG we can embed the SVG in the HTML file, we can load an external SVG file via the img tag, or we can have JavaScript code generate the SVG on-the-fly.
Let's take a quick example of each options.
SVG embedded in HTML
<html>
<head>
<title>SVG Embedded in HTML</title>
</head>
<body>
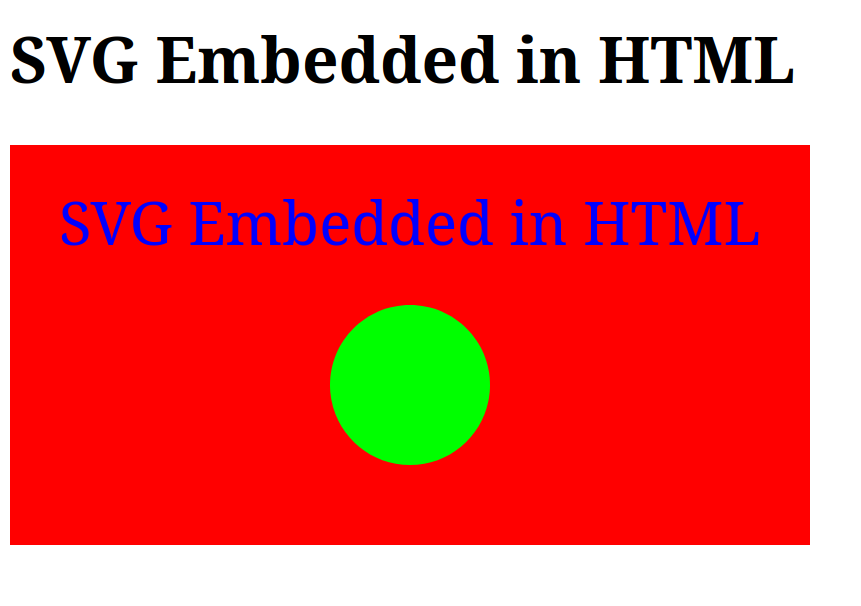
<h1>SVG Embedded in HTML</h1>
<svg width="400" height="200" xmlns="http://www.w3.org/2000/svg">
<rect width="100%" height="100%" fill="red" />
<circle cx="200" cy="120" r="40" fill="rgb(0, 255, 0)" />
<text x="200" y="50" font-size="30"
text-anchor="middle" fill="blue">SVG Embedded in HTML</text>
</svg>
</body>
</html>
The above HTML file will render to this:
SVG loaded in an img tag
In many cases it is probbably better to separate the SVG content from the HTML itself with all the usual pro and contra reasons.
Pro:
- separating the SVG file allows the developer to vide and edit it separately
- browsers can cache the svg image and this if the same image is reused on multiple page the browser does not need to load the data several times.
Contra:
- Browsers need to make a separate request to load each SVG file.
Move the SVG part to a separate file with .svg extension:
<svg width="400" height="200" xmlns="http://www.w3.org/2000/svg">
  <rect width="100%" height="100%" fill="rgb(230, 230, 230)" />
  <circle cx="200" cy="120" r="40" fill="rgb(0, 255, 0)" />
  <text x="200" y="50" font-size="30"
     text-anchor="middle" fill="blue">SVG loaded via img tag</text>
</svg>
In the HTML document refer to the file via an img tag:
<html>
    <head>
        <title>SVG loaded via img</title>
    </head>
<body>

<h1>SVG loaded via img</h1>

<img src="load-svg-via-img-tag.svg">

<img src="book-cover.svg">

</body>
</html>
The page is rendered like this:

SVG generated by JavaScript
TODO
Shapes
Circle
<svg width="100" height="100" xmlns="http://www.w3.org/2000/svg">
  <circle cx="50" cy="50" r="40" stroke="green" stroke-width="4" fill="yellow" />
</svg>

Rectangle
<svg width="150" height="100" xmlns="http://www.w3.org/2000/svg">
  <rect width="100%" height="100%" fill="green" />
  <rect width="70" height="50" x="20"  y="20" fill="blue" />
</svg>

Lines
Blue line
<svg width="300" height="200" xmlns="http://www.w3.org/2000/svg">
  <line x1="0" y1="0" x2="300" y2="200" style="stroke:blue;stroke-width:5" />
</svg>

Purple Horizontal Line
<svg  width="300" height="50" xmlns="http://www.w3.org/2000/svg">
  <line x1="0" y1="30" x2="250" y2="30" style="stroke:purple;stroke-width:10" />
</svg>

Purple Vertical Line
<svg width="300" height="50" xmlns="http://www.w3.org/2000/svg">
  <line x1="0" y1="0" x2="0" y2="200" style="stroke:red;stroke-width:14" />
</svg>

Polygon
<svg width="150" height="100" xmlns="http://www.w3.org/2000/svg">
  <polygon points="0,0 100,50 50,100" style="fill:#2ABFB5;stroke-width:3" />
</svg>

Square
<svg width="150" height="100" xmlns="http://www.w3.org/2000/svg">
  <polygon points="50,0 100,0  100,50  50,50" style="fill:#2ABFB5;stroke-width:3" />
</svg>

Hexagon
<svg width="300" height="300" xmlns="http://www.w3.org/2000/svg">
  <polygon points="
    150,15
    258,77
    258,202
    150,265
    42,202
    42,77
  " style="fill:#2ABFB5;stroke:black;stroke-width:3" />
</svg>

5-pointed Star
<svg width="220" height="228" xmlns="http://www.w3.org/2000/svg">
  <rect width="100%" height="100%" fill="white" stroke="black" stroke-width="1" />
  <polygon points="
    110,20
    50,208
    200,88
    20,88
    170,208
    "
    fill="#2ABFB5"
    stroke="black"
    stroke-width="3"
    />
</svg>

   <!-- fill-rule="evenodd" -->

Star of David
<svg width="220" height="249" xmlns="http://www.w3.org/2000/svg">
  <rect width="100%" height="100%" fill="white" stroke="black" stroke-width="1" />
  <polygon points="
    10,66
    210,66
    110,239
    "
    fill="none"
    stroke="#0038b8"
    stroke-width="10"
    />

  <polygon points="
    10,183
    210,183
    110,10
    "
    fill="none"
    stroke="#0038b8"
    stroke-width="10"
    />
</svg>
<!--height is 4 width is 2*3 =6 -->

<!--

173 full height
17+x+y+x = 253
2x+y = 236
x+y=173
x = 63
-->

Triangle
<svg width="150" height="100" xmlns="http://www.w3.org/2000/svg">
  <polygon points="0,60 75,0 150,60" style="fill:#2ABFB5;stroke-width:3" />
</svg>

Polyline - Snail
<svg height="210" width="500" xmlns="http://www.w3.org/2000/svg">
  <polyline
     points="
        10,10
        190,10
        190,190
        20,190
        20,20
        180,20
        180,180
        30,180
        30,30
        170,30
        170,170
        40,170
        40,40
        160,40
        160,160
        50,160
        50,50
        150,50
        150,150
        60,150
        60,60
        140,60
        140,140
        70,140
        70,70
        130,70
        130,130
        80,130
        80,80
        120,80
        120,120
        90,120
        90,90
        110,90
        110,110
        100,110
        100,100
     "
     style="fill:none;stroke:red;stroke-width:3" />
</svg>

<svg height="210" width="500" xmlns="http://www.w3.org/2000/svg">
  <polyline
     points="
        10,10
        50,70
        90,10
        130,70
        170,10
     "
    fill="none"
    stroke="cyan"
    stroke-width="3"
  />
</svg>

Text
<svg width="150" height="100" xmlns="http://www.w3.org/2000/svg">
  <rect width="100%" height="100%" border="black"
     style="fill:white;stroke-width:3;stroke:black" />
  <text x="75" y="60" font-size="30" text-anchor="middle" fill="red">Text</text>
</svg>

Rectangles
No color (no fill)
We can create a rectangle exactly the same width and height as the full image and wihout setting the fill attribute it will be black:
<svg width="150" height="100" xmlns="http://www.w3.org/2000/svg">
  <rect width="150" height="100" />
</svg>

Set the width and height as a percentage
<svg width="150" height="100" xmlns="http://www.w3.org/2000/svg">
  <rect width="100%" height="100%" />
</svg>

Violet - setting the color in 4 different ways
<svg width="150" height="100" xmlns="http://www.w3.org/2000/svg">

  <rect width="40" height="40" fill="#F06"/>

  <rect width="40" height="40" x="110" style="fill:#F06"/>

  <rect width="40" height="40" y="60" fill="rgb(255, 0, 66)"/>

  <rect width="40" height="40" x="110" y="60" style="fill:rgb(255, 0, 66)"/>
</svg>

fillsets the background color of a shape, e.g. a rectangle.
White rectangle with border
<svg width="150" height="100" xmlns="http://www.w3.org/2000/svg">
  <rect width="40" height="100" fill="#FFF" stroke="black" stroke-width="1" />
  <rect width="40" height="100" x="110" style="fill:#FFF;stroke:black;stroke-width:1" />
</svg>

-
fillsets the background color. -
strokesets the color of the border. -
stroke-widthsets the width (in pixels) of th border. -
We can also use
styleto set all 3 attributes.
Square
A square is just a rectangle where all the sides are the same length. Nothing special.
<svg width="150" height="150" xmlns="http://www.w3.org/2000/svg">
  <rect width="25%" height="25%" fill="green" />
  <rect width="50" height="50" x="70"  y="70" fill="blue" />
</svg>

Ellipse
<svg width="150" height="150" xmlns="http://www.w3.org/2000/svg">
  <rect width="100%" height="100%" fill="white" stroke="black" stroke-width="1" />
  <ellipse rx="75" ry="40" cx="75" cy="75" fill="green" />
</svg>

rxis the horizontal radius (so half of the width of the ellipe).ryis the vertical radious (so half of the hight of the ellipse).cxis the horizontal center of the ellipse.cyis the vertical center of the ellipse.
Horizontal linear gradient
<svg width="400" height="150" xmlns="http://www.w3.org/2000/svg">
  <defs>
    <linearGradient id="grad1" x1="0%" x2="100%" y1="0%" y2="0%">
      <stop offset="0%" stop-color="blue" />
      <stop offset="100%" stop-color="green" />
    </linearGradient>
  </defs>
  <rect width="300" height="70" x="85" y="55" fill="url(#grad1)" />
</svg>

Drawings
House front
<svg width="150" height="100" xmlns="http://www.w3.org/2000/svg">
  <polygon points="40,60 75,20 110,60" fill="#2ABFB5" />
  <rect width="70" height="50" x="40"  y="60" fill="blue" />
</svg>

- A square (or rectangle) and a triangle on the top.
Flags
Flag of Hungary
- Using
pathbased on the version on the Wikipedia

<svg xmlns="http://www.w3.org/2000/svg" width="1200" height="600">
   <path d="M0   0 H1200 V200 H0" fill="#ce2939"/>
   <path d="M0 200 H1200 V400 H0" fill="#fff"/>
   <path d="M0 400 H1200 V600 H0" fill="#477050"/>
</svg>
A path can be used to define complex shapes, but in this case the shapes are rather simple. 3 rectangles.
In the path element we can provide commands.
Mmeans move to (x,y) coordinates. So the first line say Move to coordinates (0, 0).Hmeans move horizontally to the x coordinate. So H1200 means move to (1200, 0).Vmeans move vertically to the y coordinate So V200 means to move (1200, 200).H0means move to the x=0 coordinate.
Each path element also has a color associated with it in the fill attribute.
- Using
rectIn this solution we draw 3 rectangles of the appropriatewidth,heightplacing them at variousycoordinates (xdefaults to 0) and filling them with the appropriate color.
<svg xmlns="http://www.w3.org/2000/svg" width="1200" height="600">
    <rect width="1200" height="200" y="0"   fill="#ce2939" />
    <rect width="1200" height="200" y="200" fill="#fff" />
    <rect width="1200" height="200" y="400" fill="#477050" />
</svg>

Flag of Switzerland
<svg xmlns="http://www.w3.org/2000/svg" width="512" height="512" viewBox="0 0 32 32">
    <path d="M0 0 H32 V32 H-32 Z" fill="#f00"/>
    <path d="M13 6 h6 v7 h7 v6 h-7 v7 h-6 v-7 h-7 v-6 h7 z" fill="#fff"/>
</svg>

SVG using Perl
You can also generate SVG using a Perl module called, SVG and a plethora of other SVG related modules.
I assume that if you would like to use Perl then you know how to install the SVG module from CPAN, so I'll just show a number of examples.
Default SVG
Probably the most basic use of the module is to generate an SVG image without any content.
After loading the module we create an instance using the new method and then render the SVG using the xmlify method.
You can print the resulting string to the screen as we do in this example or you could have saved it in a file directly. It all depends on your use-case.
use strict;
use warnings;
use SVG;

my $svg= SVG->new();
print $svg->xmlify();
The generated SVG looks like this: (I added some newlines to make the lines shorter to fit on the page).
<?xml version="1.0" encoding="UTF-8" standalone="yes"?>
<!DOCTYPE svg PUBLIC "-//W3C//DTD SVG 1.0//EN"
   "http://www.w3.org/TR/2001/REC-SVG-20010904/DTD/svg10.dtd">
<svg height="100%" width="100%"
   xmlns="http://www.w3.org/2000/svg"
   xmlns:svg="http://www.w3.org/2000/svg"
   xmlns:xlink="http://www.w3.org/1999/xlink">
	<!--
	Generated using the Perl SVG Module V2.87
	by Ronan Oger

	-->
</svg>
It has a lot of text besides what is strictly necessary.
There are the xml and DOCTYPE tags
The svg tag has xmlns, xmlns:svg, xmlns:xlink fields besides height and width.
After that there is a comment with the giving credit to the Perl module and the original author of the module.
You can keep these or you can make the SVG file a bit smaller by removing some of the unnecessary parts.
Plain SVG: inline and without credits
Inline SVG and no credits
Passing the -inline flag to the new method will remove the xml, DOCTYPE tags.
Passing the -nocredits flag will remove the comment with the credit.
I could not find a way to totally eliminate the xmlns:svg and xmlns:xlink attributes.
use strict;
use warnings;
use SVG;

my $svg= SVG->new(-nocredits => 1, -inline => 1);
print $svg->xmlify();
The resulting SVG (after adding some newlines to make all the rows fit on the screen):
<svg height="100%" width="100%"
  xmlns="http://www.w3.org/2000/svg"
  xmlns:svg="http://www.w3.org/2000/svg"
  xmlns:xlink="http://www.w3.org/1999/xlink" />
Inline SVG and no credit at load time
Alternatively we could set the -inline and -nocredits parameters when we first load the module into memory.
That will change the default behaviour of the library and thus in we don't need to pass the flags to the constructor.
use strict;
use warnings;
use SVG (-nocredits => 1, -inline => 1);

my $svg= SVG->new();
print $svg->xmlify();
The resulting SVG is the same as in the prevous case.
<svg height="100%" width="100%"
   xmlns="http://www.w3.org/2000/svg"
   xmlns:svg="http://www.w3.org/2000/svg"
   xmlns:xlink="http://www.w3.org/1999/xlink" />
Circle using Perl
The code:
use strict;
use warnings;
use SVG (-nocredits => 1, -inline => 1);

my $svg= SVG->new( width => 200, height => 200);
$svg->circle( cx => 100, cy => 100, fill => "#f37", r => 50);
print $svg->xmlify();
The generated SVG
<svg height="200" width="200" xmlns="http://www.w3.org/2000/svg" xmlns:svg="http://www.w3.org/2000/svg" xmlns:xlink="http://www.w3.org/1999/xlink">
	<circle cx="100" cy="100" fill="#f37" r="50" />
</svg>
The image:

Rectangle using Perl
The code:
use strict;
use warnings;
use SVG (-nocredits => 1, -inline => 1);

my $svg= SVG->new( width => 200, height => 200);
$svg->rectangle(
    x      => 10,
    y      => 20,
    width  => 180,
    height => 120,
    rx     => 10,
    ry     => 30,
    fill   => "#3a83c5",
);
print $svg->xmlify();
The generated SVG
<svg height="200" width="200" xmlns="http://www.w3.org/2000/svg" xmlns:svg="http://www.w3.org/2000/svg" xmlns:xlink="http://www.w3.org/1999/xlink">
	<rect fill="#3a83c5" height="120" rx="10" ry="30" width="180" x="10" y="20" />
</svg>
The image:

Book cover
![]()
<svg    width="2100" height="3000" xmlns="http://www.w3.org/2000/svg">
  <rect width="100%" height="2000"          fill="grey" />
  <rect width="100%" height="1000" y="2000" fill="black" />

  <image x="100" y="100" href="python-logo-only.svg" />

  <image x="300" y="100" width="833.71017" height="1010.0108" href="python-logo-only.svg" />

  <text x="75" y="2200" font-size="150" text-anchor="left" fill="white">Functional Programming</text>
  <text x="1050" y="2450" font-size="150" text-anchor="middle" fill="white">in Python</text>

  <text x="1450" y="2900" font-size="70" text-anchor="left" fill="yellow">by Gábor Szabó</text>
</svg>
